SAML with AzureAD
To configure AzureAD SAML for erwin Mart Portal authentication, follow these steps:
-
Log in to Microsoft Entra admin center.
-
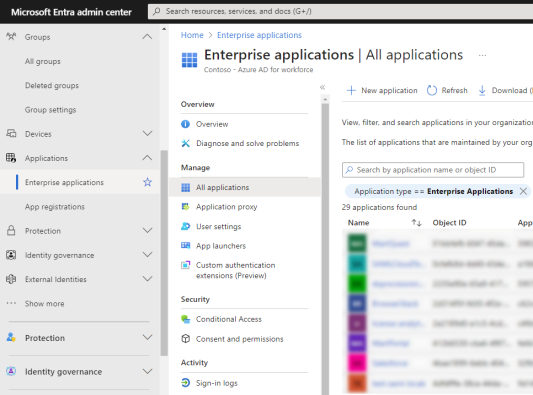
Click Applications > Enterprise Applications.
-
Click New application and create your non-gallery application with an appropriate name.
-
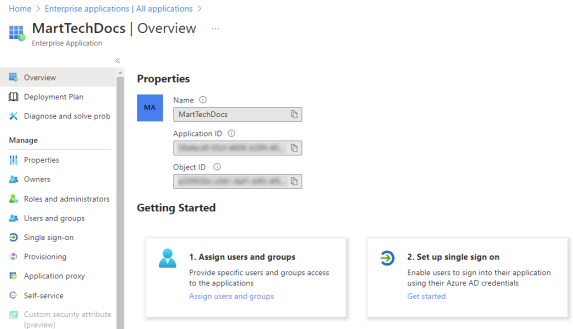
Open your newly created application.
-
Click Set up single sign on.
-
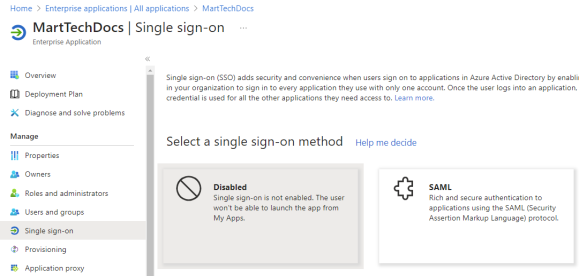
Under single sign-on method, click SAML.
-
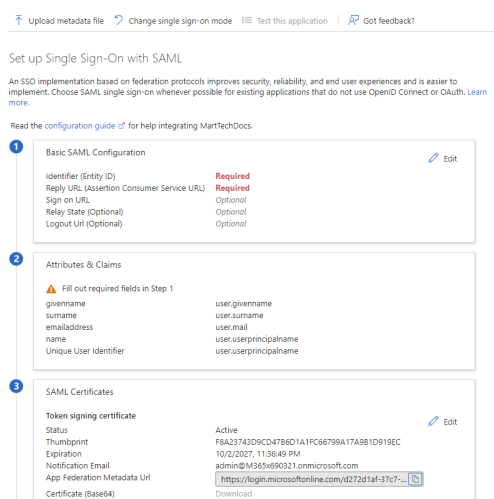
Click Upload metadata file and select the file that you downloaded (erwin Mart Portal Configuration > Authentication tab > Download SP Metadata) during erwin Mart Portal configuration.
Doing this retrieves and adds the necessary information for you.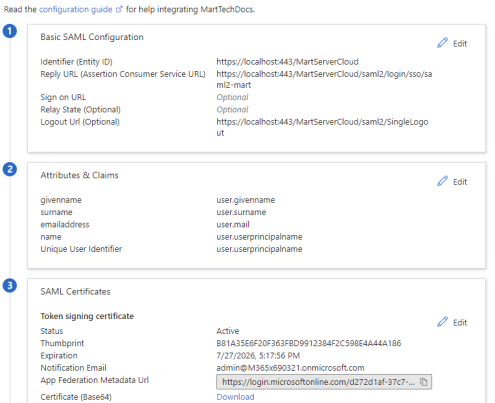
-
Copy the App Federation Metadata Url.
-
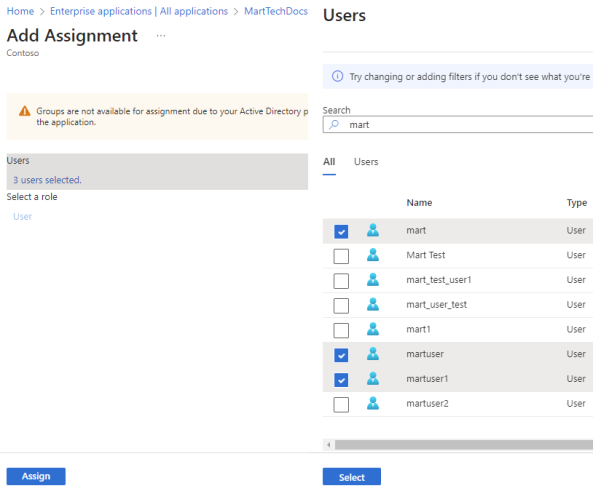
Click Users and groups > Add user/group and select required users or groups.
-
Click Select. Then, click Assign.
Your SAML SSO set up for the required users is complete. Next, during erwin Mart Portal configuration, you can configure SAML
During erwin Mart Portal configuration, on the Authentication tab, for SAML, follow these steps:
-
Select URL and paste the URL copied in step 8 above in the MetaData XML field.
-
In the Group Attribute Name and User Email Attribute Name, enter appropriate attribute names that are configured for Azure AD SAML SSO.
Adding Groups in erwin Mart Portal
To add your AzureAD SAML groups to erwin Mart Portal, follow these steps:
-
In the Microsoft Entra admin center, click Groups > All groups > Download groups.
A CSV file with all your groups is downloaded. -
Log in to erwin Mart Portalas administrator.
-
Go to Application Menu > Users.
The Users page appears.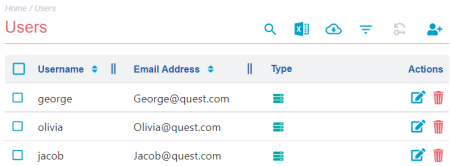
-
Click
 .
.
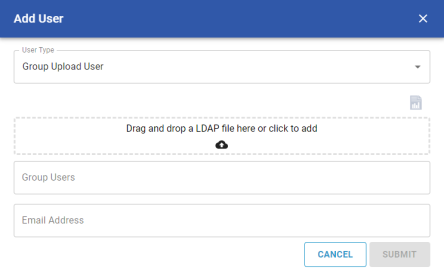
The Add User page appears.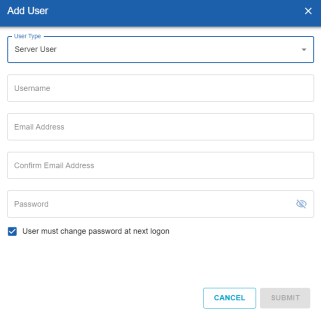
-
Under User Type, select Group Upload User.
-
Drag and drop the CSV file that you downloaded in step 1.
-
Under Group Users, select the required groups.
-
Click Submit.
|
Copyright © 2025 Quest Software, Inc. |